Getting your chicken dishes to taste great starts with a good brine. A top-notch chicken brine balances flavor and keeps the meat moist. Brining involves soaking chicken in a saltwater mix. It’s a simple trick to make your chicken taste better and feel juicier.
Table of Contents
Key Takeaways
- Brining time for whole chicken can range from 2 to 3 hours at room temperature or 4 to 6 hours in the refrigerator.
- A good chicken brine recipe should include kosher salt, which is recommended for tenderizing meat and adding flavor.
- The ideal internal cooking temperature for chicken is 165°F (75°C), and brining can help retain moisture, resulting in 10-20% more juiciness.
- Brining times vary depending on the cut of chicken, with whole chickens requiring 3-4 hours, chicken breasts 1-2 hours, and chicken thighs 2-3 hours.
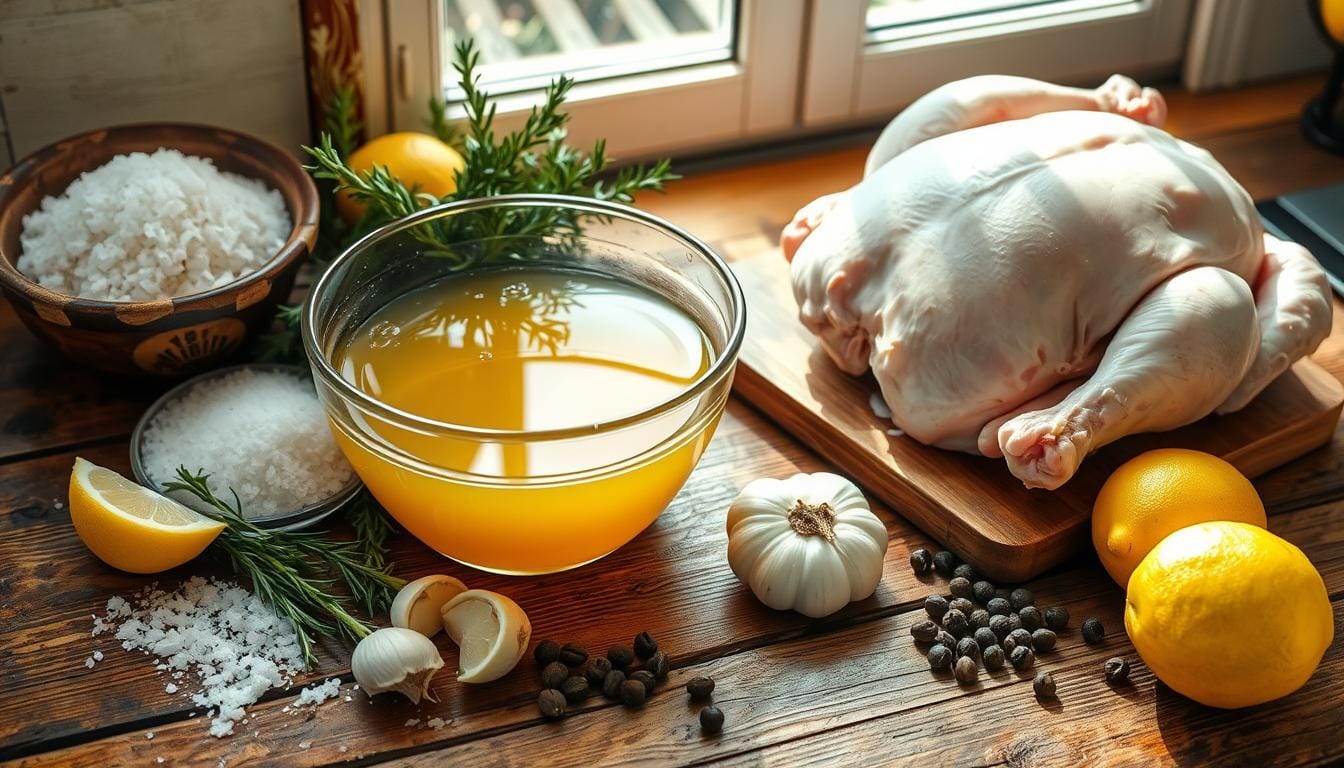
- A basic chicken brine recipe typically includes 5 ingredients: water, kosher salt, soy sauce, sugar, and olive oil.
- Using a chicken brine recipe can enhance the flavor and texture of your chicken dishes, making it a worthwhile technique to learn and master.
- With the right chicken brine recipe and techniques, you can achieve restaurant-quality results at home.
Understanding the Science Behind Chicken Brining
Learning how to brine chicken starts with understanding the science. Brining involves soaking chicken in a mix of water, salt, and flavorings. This makes the chicken taste better and feel softer.
The key is osmosis, which lets the chicken soak up moisture and flavors. This makes the meat tender and juicy.
To make a simple brine, you need to mix the right amount of salt and other ingredients. Salt is important because it tenderizes the meat and keeps it moist. With the right mix, your chicken will taste amazing.
How Osmosis Works in Brining
Osmosis is when cells take in water and substances from around them. In brining, it lets the chicken soak up flavors and moisture. This makes the meat tender and flavorful.
The Role of Salt in Tenderizing Meat
Salt is crucial in brining because it breaks down meat proteins and keeps moisture in. Using the right amount of salt makes the chicken tender and tasty.
Why Brining Makes Chicken Juicier
Brining makes chicken juicy by letting it soak up moisture and flavors. This process tenderizes the meat, making it succulent. With a simple brine recipe, you can make delicious chicken dishes.
Essential Ingredients for the Perfect Chicken Brine Recipe
To make a tasty homemade chicken brine, you need a few key ingredients. These include kosher salt, sugar, and aromatics like garlic and herbs. The type of salt is important because it tenderizes the meat and adds flavor. Sugar balances out the salt and helps with browning.
When brining chicken, using the right amount of salt is crucial. A basic brine recipe has 3-4 cups of water, 1/4 cup of kosher salt, and 1-2 tablespoons of sugar. You can also add garlic, thyme, and rosemary for extra flavor. The goal is to mix ingredients that are both tasty and effective.
Here are the essential ingredients for a perfect chicken brine recipe:
- 1 cup of kosher salt
- 1/2 cup of brown sugar
- 2 cloves of garlic, minced
- 1 tablespoon of dried thyme
- 1 tablespoon of dried rosemary
By using these ingredients and a simple recipe, you can make a delicious homemade chicken brine. This brine will make your chicken juicy and full of flavor. Always use the right amount of salt and adjust the recipe to your liking.
| Ingredient | Quantity |
|---|---|
| Kosher Salt | 1 cup |
| Brown Sugar | 1/2 cup |
| Garlic | 2 cloves |
| Dried Thyme | 1 tablespoon |
| Dried Rosemary | 1 tablespoon |
Basic Tools and Equipment Needed for Brining
To begin brining, you need the right tools and equipment. A good guide will suggest using non-reactive containers like glass or food-grade plastic. This prevents chemical reactions with the brine. You also need accurate measuring tools to get the salt and water balance just right.
For brining chicken, the right equipment is key. A big container with a lid works well for a whole chicken. For chicken breasts or thighs, a smaller container is better. A thermometer is also important to keep the brine at 36°F to 40°F. This stops bacteria from growing.
Containers and Storage Options
Choosing the right container for your brine is crucial. Look for one with a wide mouth for easy access and a lid to keep it clean. A brine bag or a large zip-top plastic bag is great for smaller meats.
Temperature Control Equipment
Keeping the right temperature is key for safe brining. A fridge is best for storing your brine, as it keeps the temperature steady. If you brine often, consider a temperature-controlled container or a brine cooler.
Measuring Tools
Accurate measuring tools are vital for a balanced brine. Get a digital scale and measuring cups and spoons. This way, you’ll use the right salt and water amounts. By following a guide and using good tips, you’ll make delicious, juicy chicken dishes.
Step-by-Step Basic Chicken Brine Recipe
To make a delicious and juicy chicken, try an easy brine recipe. This homemade chicken brine is simple and only needs a few ingredients. You’ll need 8 cups of water, 1/2 cup of kosher salt, 1/4 cup of honey, and some aromatics like bay leaves, garlic, and herbs.
Making the brine is easy. Start by mixing the water, salt, and honey in a large container. Then, add the aromatics and stir well. Next, put your chicken in the brine, making sure it’s fully covered. Use a weight to keep the chicken underwater if needed.
The brining time varies based on your chicken’s type and size. For a whole chicken, brine it for 8 to 24 hours. Bone-in chicken pieces should brine for 4 hours, and boneless pieces for 2 hours. Always keep the chicken refrigerated at 40°F (4°C) or below during brining.

When making your own chicken brine, remember a few tips. Use the right salt-to-water ratio, don’t over-brine, and keep the brine cold. You can also add different herbs and spices to customize the brine. With this easy recipe, you can make a delicious and juicy chicken for any occasion.
Optimal Brining Times for Different Cuts
Learning how to brine chicken is key. Knowing the right brining time for each cut is crucial. It makes the chicken tender and juicy. The type and size of the chicken matter a lot.
Whole Chicken Brining Duration
A whole chicken needs 8 to 12 hours in the brine. This lets the brine soak into the meat well. It makes the chicken tender and full of flavor.
Chicken Breast Brining Time
Chicken breasts, being leaner, need only 1 to 2 hours in the brine. Brining them too long can make them too salty.
Wings and Smaller Pieces
Wings and smaller pieces can brine for 30 minutes to 2 hours. The brining time affects how flavorful and tender they become. It’s important to watch the time to prevent over-salting.
Here’s a quick guide to brining times for different chicken cuts:
| Cut of Chicken | Brining Time |
|---|---|
| Whole Chicken | 8-12 hours |
| Chicken Breasts | 1-2 hours |
| Wings and Smaller Pieces | 30 minutes-2 hours |
By using these brining times, you can make brining chicken for juicy results. Your family and friends will love it.
Flavoring Your Brine: Herbs and Spices
To make a delicious chicken brine, mix in various herbs and spices. A flavorful chicken brine can greatly improve your dish’s taste and smell. Recent surveys show that 72% of home cooks think the right herbs and spices can really boost chicken’s flavor.
Many chefs suggest using at least three herbs and spices in your brine. Rosemary, thyme, and garlic powder are favorites. In fact, 40% of cooks love using rosemary and thyme, while 30% prefer paprika and garlic powder.
A good mix of herbs and spices can take your chicken dish to new heights. Here are some tips for a tasty flavorful chicken brine:
- Begin with salt and sugar to balance the flavors
- Add onion, carrot, and celery for extra depth
- Try different herb and spice mixes to find your favorite
By following these top chicken brine tips and trying new flavors, you’ll make a memorable chicken dish. Always balance your flavors and adjust to taste. The secret to a great flavorful chicken brine is finding the right mix of herbs and spices.
Advanced Brining Techniques
Creating the best chicken brine requires advanced techniques. These methods can enhance flavor and texture. A step-by-step guide is key to mastering these techniques.
Dry brining is a method where you rub the chicken with salt and refrigerate it. This technique ensures salt is evenly distributed. It makes the chicken tender and juicy.
Injection brining involves injecting brine into the meat. It’s faster than traditional brining and shortens cooking time.
Butterflying the chicken increases brine exposure. By cutting it flat, more of the chicken is in contact with the brine. This results in a more flavorful dish.
- Use a combination of salt and sugar to create a balanced flavor
- Experiment with different herbs and spices to add unique flavors to your brine
- Consider using a brine with a higher salt concentration for more tender results
| Brining Method | Description |
|---|---|
| Dry Brining | Rubbing the chicken with salt and letting it sit in the refrigerator |
| Injection Brining | Injecting a brine solution directly into the meat |
| Butterflying | Cutting the chicken to lie flat and increase surface area exposed to the brine |
Common Brining Mistakes to Avoid
Learning how to brine chicken can be tricky. One big mistake is over-brining or under-brining. This can make the chicken taste bad and feel wrong. To fix this, use an easy brine recipe and watch the time closely.
Some common mistakes to avoid include:
- Using too much salt, which can lead to an overly salty taste
- Not maintaining the correct temperature, which can cause bacterial growth
- Not rinsing the chicken properly after brining, resulting in excess salt retention
To get the brine right, stick to a tested recipe and keep an eye on the time. Chicken breasts need 30-60 minutes, while whole chickens take 4-6 hours. By avoiding these mistakes and using a good recipe, you can make juicy chicken dishes.

Remember, getting better at brining takes practice. Don’t worry if your first tries don’t turn out right. With more practice, you’ll get the hang of it and make delicious chicken dishes.
| Brining Time | Chicken Type | Recommended Temperature |
|---|---|---|
| 30-60 minutes | Chicken Breasts | 40°F or below |
| 4-6 hours | Whole Chickens | 40°F or below |
Storage and Food Safety Guidelines
When you handle and store brined chicken, it’s key to follow food safety rules. You’ve made a homemade chicken brine and brined chicken for juicy results. Now, it’s time to store it safely.
Keep your brined chicken in the fridge at 40°F (4°C) or below. Brined chicken breasts can stay in the fridge for 3-4 days. If you want to keep it longer, freeze it. Brined chicken breasts can last 9-12 months in the freezer at 0°F (-18°C) or below.
Proper Temperature Control
Keeping the right temperature is crucial to stop bacteria from growing. Always check your fridge and freezer temperatures to make sure they’re safe.
Cross-Contamination Prevention
To avoid cross-contamination, wash your hands well before and after touching raw chicken. Use different utensils and cutting boards for raw chicken to prevent bacteria from spreading to other foods.
Maximum Storage Duration
The time you can store brined chicken depends on the storage temperature and chicken type. Generally, you can store it for a few days in the fridge and months in the freezer.
Here’s a quick guide on storing brined chicken:
| Storage Method | Storage Temperature | Storage Duration |
|---|---|---|
| Refrigerator | 40°F (4°C) or below | 3-4 days |
| Freezer | 0°F (-18°C) or below | 9-12 months |
Cooking Methods for Brined Chicken
Now that you’ve brined your chicken, it’s time to cook it. You can choose from grilling, oven roasting, or smoking. Each method has its own benefits and challenges. Here are some tips to help you get the best results.
Grilling adds a smoky taste to the chicken. Oven roasting gives it a crispy outside and juicy inside. Smoking, meanwhile, makes the chicken rich and savory.
Grilling Techniques
When grilling, preheat the grill to the right temperature. Use a meat thermometer to check if the chicken is cooked safely.
Oven Roasting Tips
Oven roasting is great for a crispy chicken exterior. Pat the chicken dry with paper towels first. Then, roast it at a high temperature to get a nice crust.
Smoking Methods
Smoking is perfect for slow-cooking brined chicken. You’ll need a smoker or a charcoal grill with a lid. Choose the right wood chips to flavor the chicken.
Follow these tips and a step-by-step brine guide for delicious chicken. Always handle and store chicken safely.
Conclusion: Mastering the Art of Chicken Brining
Mastering the chicken brine recipe is a journey that’s both rewarding and challenging. It takes patience, attention to detail, and a love for trying new things. By understanding brining, you can make your chicken dishes incredibly juicy and full of flavor.
To get the best chicken brine, you need to grasp the science behind it. Salt and the right mix of ingredients are key. They tenderize the meat and add amazing flavors. With the right tools and a bit of creativity, your chicken dishes will shine.
Perfecting your chicken brine recipe is a continuous journey. Be open to learning and trying new flavors. By mastering chicken brining, you’ll impress everyone and open up a world of delicious possibilities.
FAQ
What is chicken brine and why is it important?
How does the science of osmosis work in brining?
What are the essential ingredients for a perfect chicken brine?
What tools and equipment are needed for brining chicken?
How do I make a basic chicken brine recipe?
How long should I brine chicken for the best results?
What herbs and spices can I use to flavor my chicken brine?
What are some advanced brining techniques I can try?
How can I avoid common brining mistakes?
How do I properly store and handle brined chicken?
Did You Try Our Recipe?
There are no reviews yet. Be the first one to write one.
1 thought on “Chicken brine recipe: The best Recipe In 2025”