Ever pulled a chicken out of the oven only to find it dry and tasteless? Those days are over. Brine chicken is about to transform your cooking game, turning ordinary poultry into a mouthwatering masterpiece that’ll have everyone asking for your secret.
Brining isn’t just a cooking technique—it’s culinary magic. By immersing chicken in a carefully crafted salt solution, you unlock a world of moisture and flavor that traditional cooking methods can’t touch. A chicken brine recipe is your gateway to consistently juicy, delectable meals that impress every single time.
Imagine serving chicken so tender it practically melts in your mouth. That’s the power of a well-executed brine chicken technique. Whether you’re a home cook or aspiring chef, mastering this method will elevate your kitchen skills dramatically.
Table of Contents
Key Takeaways
- Brining enhances chicken’s moisture and flavor
- Simple salt solution can transform meat texture
- Works for multiple chicken cuts and cooking methods
- Reduces risk of dry, tough chicken
- Easy technique suitable for home cooks
Understanding the Science of Brine Chicken
Brining turns regular chicken into a tender, flavorful dish. It’s all about the science behind salt water solutions. This method boosts meat quality in amazing ways.
When chicken soaks in a salt water solution, cool things happen. Salt breaks down proteins, making tiny spaces. These spaces hold moisture in the meat.
How Salt Solution Tenderizes Meat
Brining does more than just add flavor. Salt tenderizes meat in several ways:
- It breaks down muscle fibers
- It keeps meat moist
- It lets flavors sink deeper
Chemical Reactions During Brining
Sodium chloride molecules meet protein strands during brining. This makes proteins unwind and absorb more water. Your chicken stays juicy while it cooks.
Benefits of Brining Process
Brining makes a big difference in cooking chicken:
- It stops meat from drying out
- It adds deeper flavors
- It makes the texture more even
“Brining is like giving your chicken a flavor passport and moisture insurance.” – Professional Chef
| Meat Type | Recommended Brining Time |
|---|---|
| Boneless Chicken Pieces | 30 minutes |
| Bone-in Chicken Pieces | 1-2 hours |
| Whole Chicken | 4-12 hours |
Learning about brining’s science can take your chicken cooking to new heights. By using salt water solutions, you open up a world of flavors and textures.
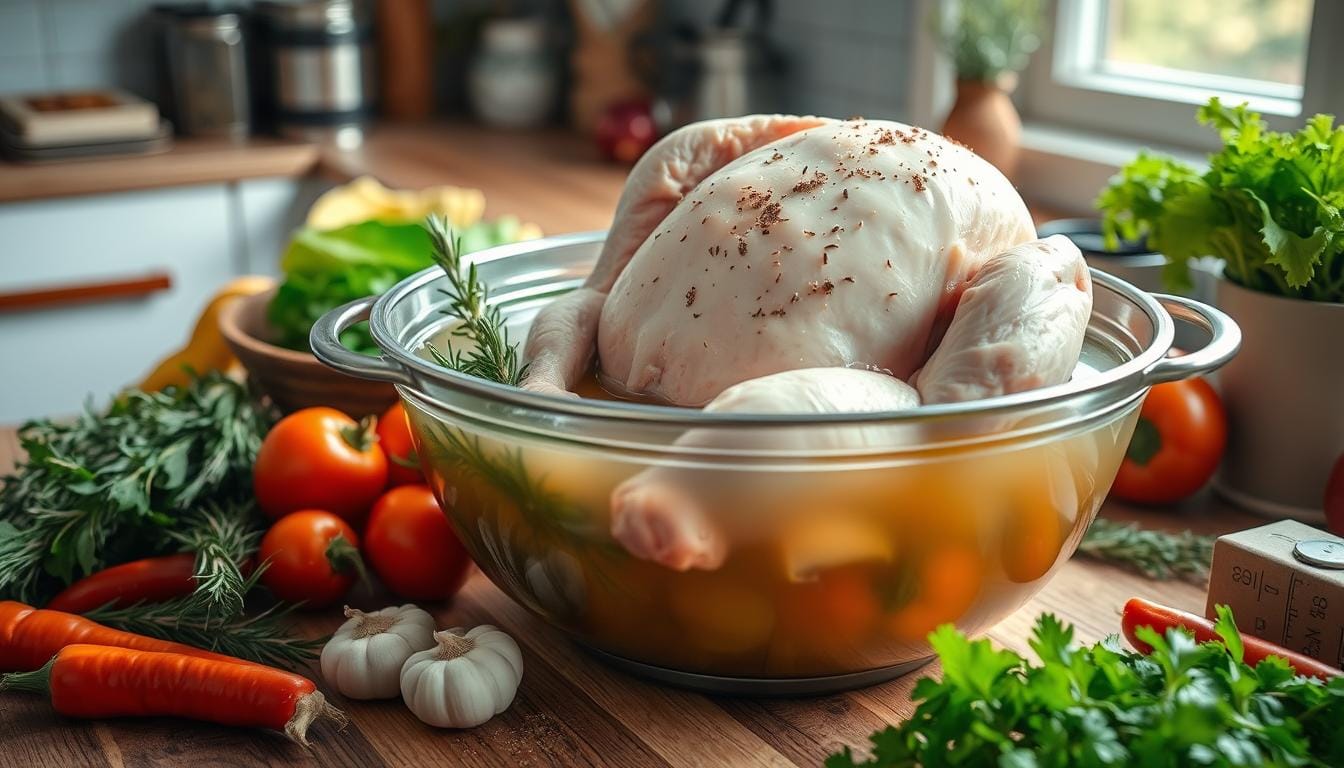
Essential Ingredients for Perfect Chicken Brine
To make a tasty chicken brine, you need to pick the right ingredients. Your chicken brine recipe will turn a simple piece of meat into a tender, flavorful dish.
“The right ingredients are the secret to a perfect brine” – Professional Chef
Here are the key parts for your chicken brine recipe:
- Liquid Base: 8 cups of warm water (1 gallon)
- Salt: 1/2 cup kosher salt (critical for tenderizing)
- Sweetener: 1/4 cup honey or sugar
- Aromatics:
- 5 smashed garlic cloves
- 3 sprigs each of rosemary, thyme, and parsley
- 1 tablespoon whole black peppercorns
- Additional Flavor: 2 sliced lemons
These ingredients work together to add moisture and flavor when you marinate poultry. Kosher salt breaks down proteins, while herbs and spices add depth to the meat.
Pro tip: Always use kosher salt instead of table salt, as its crystal structure impacts the brining process differently.
The Basic Brine Recipe for Maximum Flavor
Making the perfect chicken brine is an art that turns regular chicken into a juicy delight. A salt water solution is key to adding moisture and flavor. Whether you’re cooking at home or in a professional kitchen, learning the basic brine is essential.
Now, let’s explore the main parts of a reliable chicken brine. This will ensure your chicken is always juicy and full of flavor.
Core Ingredients for Your Brine
- 3 quarts of water
- 1 cup coarse Kosher salt
- 1 cup sugar
- Aromatic spices:
- 1 tablespoon whole black peppercorns
- 1 tablespoon whole coriander seeds
- 1 tablespoon whole allspice berries
- ½ teaspoon whole cloves
- 3 bay leaves
Step-by-Step Mixing Instructions
Mixing your chicken brine is easy. First, mix water, salt, and sugar in a big pot. Heat it until everything dissolves. Pro tip: Always use cold water after initial heating to prevent bacterial growth.
“The secret to a perfect brine is balance and patience.” – Professional Chef
Temperature Control Tips
Temperature is important in your brine. Keep it cold, between 34-40°F, for safety. For the best results, brine your chicken for 12-18 hours. But don’t brine it for more than 24 hours to avoid too much salt.
| Chicken Cut | Brining Time |
|---|---|
| Whole Chicken | 18-24 hours |
| Chicken Breast | 4-6 hours |
| Chicken Thighs | 6-8 hours |
Remember, a good chicken brine recipe can make your meat up to 40% juicier. This makes every bite incredibly tasty.
Brining Times for Different Chicken Cuts

Knowing the right brining time is key for tender and tasty chicken. Each chicken cut needs a specific brining method for the best taste and texture.
For brine chicken breast, brine for 30 to 60 minutes. Here’s how brining affects the meat:
- 15 minutes: Minimal salt flavor, no texture change
- 30 minutes: Lightly salted, slightly more tender
- 1 hour: Perfectly seasoned, notable tenderness
- 2 hours: Risk of becoming overly salty
Brining chicken thighs also has a sweet spot. Brine them for 30 minutes to 1 hour for the best flavor and juiciness.
“The key is finding the right balance between salt absorption and meat texture” – Culinary Expert
Here are some brining safety tips:
- Refrigerate for brining periods longer than 30 minutes
- Never rinse brined chicken to prevent bacterial spread
- Store brined chicken in the refrigerator for up to 3 days
Pro tip: Adding 1 tablespoon of garlic granules during the one-hour brine can significantly enhance your chicken’s flavor profile.
Mastering Brining Techniques and Methods
Exploring brining techniques can change how you cook poultry. Finding the right way to marinate poultry makes chicken tender and flavorful every time.
Professional chefs say brining is more than just salt. It’s about using methods to improve meat quality and taste.
Hot Brine vs Cold Brine: Understanding the Differences
Temperature is key in brining. Hot brines extract flavors quickly, while cold brines infuse them slowly.
- Hot Brine Advantages:
- Faster aromatics release
- Quick flavor penetration
- Ideal for intense seasoning
- Cold Brine Benefits:
- Slower, more even flavor absorption
- Reduced risk of bacterial growth
- Better moisture retention
Container Selection for Optimal Brining
Choosing the right container is key for brining poultry. Glass, food-grade plastic, or stainless steel are best.
“Your container should be large enough to fully submerge the chicken without overcrowding.” – Culinary Expert
Storage Guidelines During Brining
Proper storage is crucial for safe and effective brining. Always refrigerate your brine solution to prevent bacterial growth and keep meat quality.
- Keep brine temperature between 34-40°F
- Use airtight containers
- Never leave chicken at room temperature
- Rinse chicken with cold water after brining
Mastering these brining techniques will make your chicken dishes amazing.
Flavor Enhancement Options and Variations

Turning your chicken brine recipe into something special means trying new flavors. When you marinate poultry, you’re not just adding salt. You’re creating a canvas for delicious ingredients.
Here are some aromatic options to make your chicken brine recipe better:
- Herb Infusions: Rosemary, thyme, and sage add earthy depth
- Citrus Zests: Lemon, orange, or lime add bright, tangy notes
- Spice Blends: Peppercorns, bay leaves, and garlic create complex flavors
- Sweet Elements: Honey or brown sugar balance out the saltiness
Studies show herbs and spices can boost flavor by 20-30%. Chefs suggest using about 50% sugar to salt for the best taste and browning.
“The secret to an exceptional brined chicken is balancing salt, aromatics, and personal creativity.” – Professional Chef
Marinating poultry with these enhancements turns an ordinary chicken brine recipe into a culinary masterpiece. It will surely delight your taste buds.
Common Brining Mistakes to Avoid
Mastering brine chicken techniques means knowing what can go wrong. Understanding these pitfalls ensures your chicken turns out tender and flavorful every time.
Avoiding Over-Brining Challenges
Over-brining can make your chicken too salty. The trick is to time your brining right. Here’s what you need to know:
- 2-3 hours at room temperature
- 4-6 hours when refrigerated
- Maximum 24-hour wet brining window
Temperature Control Critical Points
Keeping the right temperature is key to safe brining. It stops bacteria from growing and keeps your food safe. Here are the important temperatures to remember:
| Brining Location | Safe Temperature Range | Maximum Duration |
|---|---|---|
| Refrigerator | Below 40°F | 6 hours |
| Room Temperature | Between 40-70°F | 2-3 hours |
Salt Content Management
Getting the salt right is crucial in brine chicken. Recommended ratios help prevent oversalting:
- 1 cup kosher salt per gallon of water for wet brining
- 1 tablespoon salt per 5 pounds of meat for dry brining
“Precision in brining is an art that separates good cooks from great ones.” – Professional Chef Recommendation
By steering clear of these common mistakes, you’ll make chicken that’s perfectly seasoned and delicious. It will impress your dinner guests and satisfy your taste buds.
Preparing Your Brined Chicken for Cooking
Now that you’ve brined your chicken, it’s time to turn it into a dish to remember. Getting it ready right is key for the best taste when you brine chicken before cooking.
- Remove the chicken from the brine solution completely
- Thoroughly pat the chicken dry with paper towels
- Allow the chicken to rest at room temperature for 15-20 minutes
- Discard the used brine solution immediately
Pro tip: Ensuring your chicken is completely dry is essential for achieving a perfect crispy exterior during cooking.
“The secret to great chicken is in the preparation, not just the cooking.” – Professional Chef
Different cuts need different prep:
| Chicken Cut | Drying Time | Recommended Action |
|---|---|---|
| Chicken Breasts | 15-20 minutes | Pat extra dry, use paper towels |
| Whole Chicken | 20-25 minutes | Ensure inside cavity is also dried |
| Chicken Thighs | 10-15 minutes | Blot with clean kitchen towel |
After drying, season your chicken with spices like smoked paprika or herbs. Your brined chicken is now ready for cooking.
Cooking Methods for Brined Chicken
After brining chicken, you can use many cooking methods to make it delicious. Knowing the best way to cook keeps your chicken juicy and full of flavor.
Roasting Techniques
To roast brined chicken, you need to control the oven temperature well. Heat your oven to 425°F and put the chicken on a rack. Cooking time is about 15-18 minutes per pound, based on the cut.
- Use a meat thermometer to check internal temperature
- Aim for 165°F at the thickest part
- Let the chicken rest 10 minutes after cooking
Grilling Guidelines
Grilling brine chicken needs careful heat control. Use indirect heat for big pieces to avoid burning and ensure even cooking.
| Chicken Cut | Grill Time | Internal Temp |
|---|---|---|
| Breasts | 6-8 minutes per side | 165°F |
| Whole Chicken | 20-25 minutes per side | 165°F |
Air Frying Tips
Air frying brine chicken gives a crispy outside and keeps it moist. Set your air fryer to 375°F and cook for about 20 minutes, flipping halfway.
“The key to perfect brine chicken is maintaining consistent temperature and avoiding overcooking.” – Professional Chef
No matter the cooking method, always make sure the chicken hits 165°F. Brine chicken before cooking to get the best tenderness and taste in every bite.
Conclusion
Learning how to brine chicken takes your cooking to the next level. It’s not just about adding flavor; it’s a way to ensure your chicken is always tender and juicy. With a few basic ingredients and techniques, you can make your chicken dishes taste like they’re from a restaurant.
Brining is just the beginning of your culinary adventure. Try out different herbs, spices, and liquids to discover new flavors. Whether it’s for a family dinner or a BBQ, your brining skills will make your chicken a hit with everyone.
Remember, the more you brine, the better you’ll get. Start with the basics, like using ¼ cup of kosher salt per quart of water. Then, let your creativity run wild. Soon, you’ll be a pro at making delicious, flavorful chicken that wows your guests.
Keep exploring new brining ideas as you cook more. Try using apple juice or fresh herbs like rosemary and thyme. Your hard work in mastering brining will pay off with consistently tasty meals that show off your growing skills.
FAQ
What is chicken brining and why should I do it?
How long should I brine different cuts of chicken?
What are the key ingredients in a basic chicken brine?
Can I brine frozen chicken?
Is it necessary to rinse chicken after brining?
What type of salt should I use for brining?
Can I brine chicken for too long?
Does brining work with organic or kosher chicken?
Can I add other flavors to my chicken brine?
Is brining safe? How do I prevent bacterial growth?
Did You Try Our Recipe?
There are no reviews yet. Be the first one to write one.
1 thought on “Tender & Juicy Brine Chicken: The Ultimate Recipe”