Every home cook dreams of serving perfectly tender, mouth-watering chicken. This makes dinner guests ask for seconds. The secret? Learning how to brine chicken.
When I first learned about chicken brining, it was like discovering a kitchen superpower. No more dry, bland chicken. Now, I have incredibly juicy, flavorful meat that tastes like it’s from a gourmet restaurant.
Learning how to brine chicken is easier than you think. It involves soaking chicken in a saltwater solution. This magic works wonders on texture and flavor. Whether you’re a weekend cook or a seasoned chef, mastering brining will make your chicken dishes unforgettable.
Table of Contents
Key Takeaways
- Brining enhances chicken moisture and tenderness
- 30-60 minutes is the optimal brining time for most cuts
- Cold water produces more tender results than warm water
- Avoid over-brining to prevent excessively salty meat
- Different chicken cuts require varying brining durations
Understanding the Science Behind Chicken Brining
Brining turns regular chicken into a juicy, flavorful dish. It’s more than just seasoning. Brining is a science that makes meat better through molecular changes.
The magic of brining starts at a tiny level. When chicken is soaked in saltwater, amazing things happen. Salt molecules enter the meat’s cells, changing it in a big way.
How Salt Penetrates the Meat
Salt is key for tender, tasty chicken. It breaks down proteins, keeping the meat moist. Brining chicken offers many benefits, including:
- Enhanced moisture retention
- Deeper flavor penetration
- More tender meat texture
The Role of Osmosis in Brining
Osmosis is vital in brining. Water moves through the meat’s cell membranes, bringing salt and flavors inside. This ensures every bite is full of flavor.
Why Brining Makes Chicken Juicier
Brined chicken loses less moisture when cooked. The salt solution helps keep more liquid in the meat. This prevents dry, tough chicken that’s common in cooking.
“Brining is like giving your chicken a moisture insurance policy” – Professional Chef
Learning about brining science can improve your cooking. You’ll make delicious, juicy chicken that everyone will love.
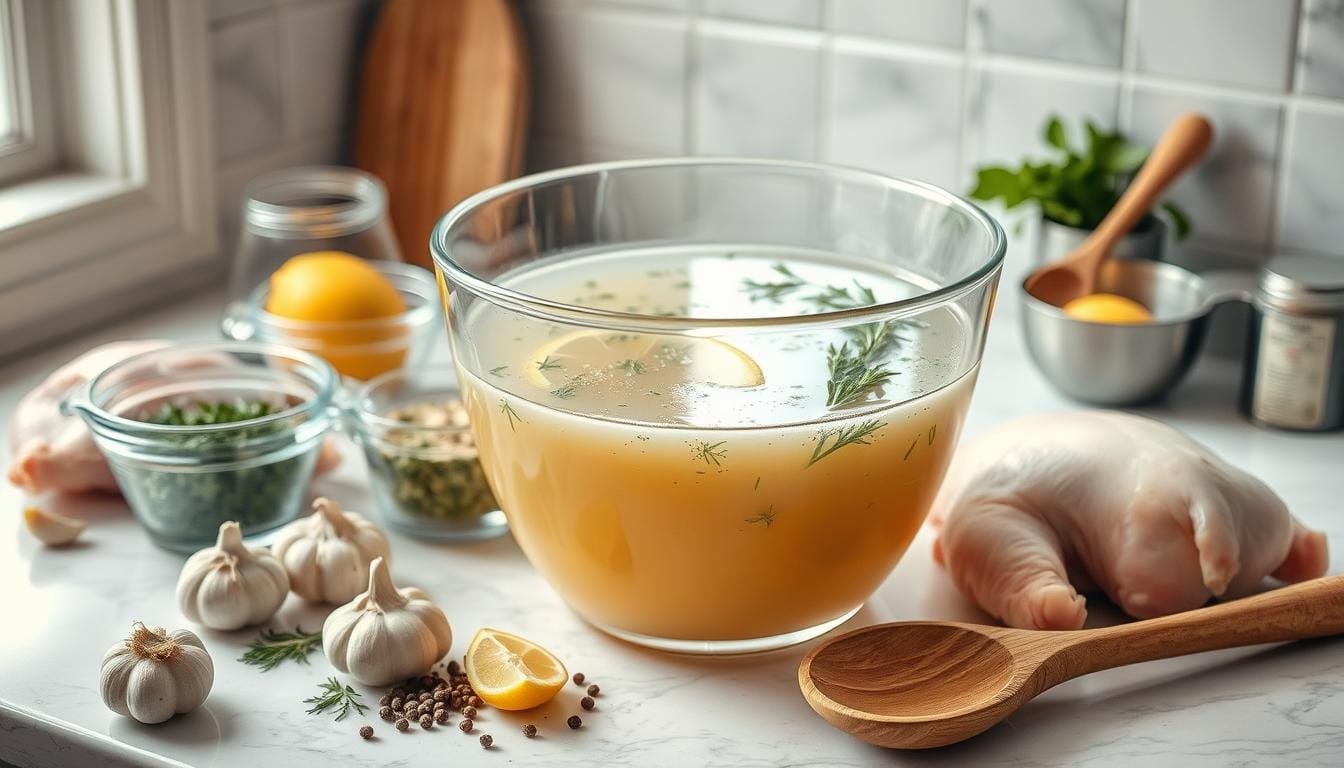
Essential Ingredients for the Perfect Chicken Brine
Creating the perfect chicken brine recipe is all about the right ingredients. They turn an ordinary chicken into a juicy, flavorful dish. Your brine ingredients are more than just salt and water – they’re the secret to restaurant-quality meat.
The foundation of any great chicken brine consists of a few key components:
- Water: 1 gallon of warm water serves as the primary liquid base
- Salt: Kosher salt is preferred for its ability to enhance tenderness
- Sugar: White sugar adds subtle sweetness and promotes browning
- Olive oil: Helps ensure moisture and tenderness
- Additional aromatics: Garlic, herbs, and spices for depth of flavor
The typical brine mixture combines:
- 4 cups cold water
- 6 tablespoons Diamond Crystal kosher salt
- ¼ cup sugar (optional)
- 1-2 cloves of garlic
“The right brine can turn an ordinary chicken into a culinary masterpiece.” – Professional Chef
Try adding optional flavor enhancers like lemon slices, rosemary, thyme, or a splash of soy sauce. Each ingredient adds unique flavors to your chicken brine recipe. This lets you customize the taste to your liking.
Choose a container that’s at least twice the volume of your brine. Stainless steel stockpots, brining bags, or food-grade plastic buckets work best. Your goal is to create a brine that perfectly seasons and tenderizes the chicken.
How to Brine Chicken: Step-by-Step Guide
Learning to brine chicken can make your meals juicy and full of flavor. It’s a simple method that boosts the taste and texture of meat.
First, get your ingredients ready and pick the right tools for brining. Paying close attention to details is key for great results.
Preparing Your Brine Solution
Creating a good brine is essential for tender chicken. Here’s a reliable recipe for your brine solution:
- 8 cups cold water
- 1/2 cup kosher salt
- 1/4 cup honey
- 3 dried bay leaves
- 5 smashed garlic cloves
- 1 tablespoon whole black peppercorns
- Fresh herbs: rosemary, thyme, and parsley
- 2 sliced lemons
Submerging the Chicken
Make sure the chicken is fully covered in the brine. Use a non-reactive container like glass or food-grade plastic. Refrigerate the chicken during the entire brining time.
Monitoring Brining Time
Brining time depends on the chicken cut:
- Whole chicken: 8-24 hours
- Bone-in pieces: Approximately 4 hours
- Boneless pieces: Maximum 2 hours
“The key to perfect brining is timing and balance.” – Culinary Expert
After brining, rinse the chicken well and pat it dry. This step removes excess salt and gets the meat ready for cooking.
Wet Brine vs Dry Brine Methods
Preparing chicken can be a game-changer when you know the difference between wet brine and dry brine. Both methods aim to add flavor and keep the meat moist. But they do it in different ways.
Exploring the Key Differences
Wet brining means soaking chicken in a saltwater mix. Dry brining uses a salt and spice rub on the chicken’s surface. Each method has its own benefits for making tasty chicken.
- Wet Brine Characteristics:
- Needs 1-2 days for seasoning
- Uses a liquid mix (water, salt, optional extras)
- Makes chicken more moist
- Dry Brine Characteristics:
- Makes the skin crispy
- Flavors are more intense
- Uses less fridge space
“The choice between wet and dry brining can dramatically impact your chicken’s final taste and texture.” – Culinary Expert
Dry brining uses the meat’s juices to create strong flavors in 24-48 hours. Wet brining is better for lean chicken, adding extra moisture.
Practical Considerations
Choosing between wet and dry brining depends on what you want. Dry brining is great for crispy skin, while wet brining keeps chicken juicy.
| Brining Method | Flavor Intensity | Skin Texture | Preparation Time |
|---|---|---|---|
| Wet Brine | Mild to Moderate | Softer | 24-48 hours |
| Dry Brine | Deep and Concentrated | Crispy | 12-24 hours |
Remember, safety is key. Always chill your chicken during brining to avoid bacterial risks.
Optimal Brining Times for Different Cuts
Learning the right chicken brining time is key to making your meat juicy and flavorful. Each chicken cut needs a specific brining time for the best taste and texture.
Knowing the perfect brining time can make your cooking stand out. Every chicken cut is different, affecting how long it should brine.
Whole Chicken Brining Recommendations
For a whole chicken, brine it for 8-12 hours. It’s important to keep it in the fridge to stay safe and prevent bacteria.
- Room temperature brining: 2-3 hours
- Refrigerated brining: 4-6 hours
- Maximum recommended brining time: 12 hours
Chicken Breast Brining Specifics
Chicken breasts need less time to brine than whole chickens. Brine them for 1-2 hours if they’re boneless and skinless.
- Room temperature: 30-45 minutes
- Refrigerated: 1-2 hours
Thighs and Wings Brining Guide
Chicken thighs and wings have unique brining needs. They usually brine for 1-4 hours, depending on size and whether they’re bone-in or boneless.
| Chicken Cut | Brining Time |
|---|---|
| Chicken Thighs | 2-4 hours |
| Chicken Wings | 1-2 hours |
Pro tip: Always pat your chicken dry after brining to ensure crispy skin and prevent excess saltiness.
“The secret to juicy chicken is understanding its brining time.” – Professional Chef
Common Brining Mistakes to Avoid
Mastering the best brine for chicken means avoiding common mistakes. Brining might seem simple, but errors can turn a great meal into a bad one.

Knowing the pitfalls of chicken brining is key to getting juicy, tasty results. Here are the main mistakes to avoid:
- Over-Brining: Chicken can become too salty and mushy if brined too long
- Incorrect salt-to-water ratio messes up the brine’s effectiveness
- Using reactive containers can change the meat’s flavor
- Not keeping the brining area cold enough
“Precision is key when brining chicken – every minute and every grain of salt matters.”
Brining chicken right requires focus on timing and technique. For wet brining, brine for 1 hour per pound. The best salt mix is 1 cup of kosher salt per gallon of water.
| Brining Method | Duration | Salt Ratio |
|---|---|---|
| Wet Brining | 1-24 hours | 1 cup salt per gallon |
| Dry Brining | 20-30 minutes | 1 tbsp salt per 5 pounds |
Pro tip: Use non-reactive containers like food-grade plastic or glass. Keep chicken cold, between 33-40°F, to avoid bacterial growth and ensure safety.
Adding Aromatics and Flavoring to Your Brine
Turning a simple chicken brine into a dish to remember is all about the right mix of aromatics and flavor boosters. By picking the perfect herbs, spices, and extras, you can make your brined chicken truly stand out.
Herb and Spice Flavor Profiles
Your chicken brine can be a blank slate for amazing flavors. Here are some top picks:
- Rosemary and thyme for a classic herbal touch
- Sage for an earthy, robust flavor
- Bay leaves for subtle depth
- Whole black peppercorns for gentle heat
Citrus and Garlic Enhancements
Adding bright citrus and strong garlic can really take your chicken brine to the next level. Try these:
- Lemon slices with fresh garlic cloves
- Orange zest with crushed garlic
- Lime juice with minced garlic
Sweet and Savory Flavor Combinations
Mixing sweet and savory can add a surprising twist to your brine. Here are some ideas:
- Honey and fresh thyme
- Brown sugar and smoked paprika
- Maple syrup and cracked black pepper
“The secret to a memorable chicken brine is creativity and balance in your flavor selections.”
Remember, the aim is to add to, not overwhelm, your chicken’s natural taste. Begin with small amounts of aromatics and adjust as needed.
Storage and Food Safety Guidelines

Proper storage is key when brining chicken before cooking. After making your brine solution, follow certain food safety rules. This keeps your chicken fresh and safe to eat.
Here are important points for storing brined chicken:
- Keep brined chicken refrigerated at 40°F (4°C) or colder
- Store in a covered container to prevent cross-contamination
- Use within 3 days of brining for optimal quality
Brining chicken before cooking needs careful handling. Always use clean utensils and surfaces to avoid bacterial growth. Raw chicken can harbor harmful bacteria, so careful storage is essential.
Food safety is not an option—it’s a necessity when preparing chicken.
Freezing brined chicken is also an option, but follow these guidelines:
- Wrap chicken tightly in freezer-safe packaging
- Label with the date of brining
- Store for up to 2 months maximum
- Thaw in the refrigerator, never at room temperature
Before cooking, always check your brined chicken for spoilage. Throw it away if you see any off odors, unusual color, or slimy texture.
Best Cooking Methods for Brined Chicken
Now that you know how to brine chicken easily, it’s time to learn the best ways to cook it. The right cooking method can make your chicken taste amazing and stay juicy.
Brining chicken makes it perfect for many cooking techniques. Here are the top ways to cook your seasoned chicken:
- Roasting: Ideal for whole chickens and larger cuts
- Grilling: Adds smoky flavor while maintaining moisture
- Pan-Searing: Creates a crispy exterior for chicken breasts
- Sous Vide: Ensures precise temperature control
Pro tip: Skip adding extra salt during cooking, as your chicken is already well-seasoned from the brining process.
It’s important to know the right cooking temperatures and times for brined chicken. The chicken should be cooked to an internal temperature of 165°F (74°C). This is 15-20% faster than cooking unbrined chicken.
| Cooking Method | Temperature | Approximate Cooking Time |
|---|---|---|
| Oven Roasting | 350°F | 50-60 minutes |
| Grilling | Medium-High Heat | 15-20 minutes |
| Pan-Searing | Medium-High Heat | 6-8 minutes per side |
Brined chicken can keep up to 40% more moisture while cooking. For the crispiest skin, chill the chicken uncovered for up to 24 hours after brining before cooking.
Conclusion
Brining chicken is more than just cooking. It’s a way to make even simple chicken dishes amazing. You’ve learned how salt, moisture, and flavor work together to make chicken juicy and tender.
Don’t stop here. Try new flavors and brining times for different chicken pieces. Keep improving your brining skills. The right mix of ingredients, timing, and creativity are key. Brining makes chicken moist, tender, and full of flavor, making meals unforgettable.
With this guide, you’re ready to change how you cook chicken. Brining will help you make delicious chicken for any meal, big or small. It’s your secret to making chicken that everyone will love.
FAQ
What is brining and why should I do it?
How long should I brine chicken?
What’s the difference between wet and dry brining?
What salt should I use for brining?
Can I add other ingredients to my brine?
Is brining safe? How do I handle brined chicken?
Can I brine frozen chicken?
Will brining make my chicken too salty?
Can I brine different cuts of chicken together?
What cooking methods work best for brined chicken?
Did You Try Our Recipe?
There are no reviews yet. Be the first one to write one.
2 thoughts on “How to Brine Chicken for Juicy, Flavorful Results”